This article explains how to configure the ONS-CR2440XP so that it can be managed without OneView™, as a standalone switch.
Although primarily designed to be connected to Optigo's aggregation switch and managed from OneView™, the ONS-CR2440XP can also be managed as a standalone switch with its built-in management interface.
Accessing the ONS-CR2440XP Management Interface
- With your ONS-CR2440XP powered up, but connected to no other equipment, reset it to defaults by holding down the reset button. When you push the button, the System LED should start blinking. After 10 seconds, all of the port LEDs will turn solid green. You now can release the button now and wait about 2 minutes for the switch management to be ready.
- Set up your computer's network settings as follows:
IP Address = 192.168.255.100
Subnet Mask = 255.255.255.0 - Connect your computer's Ethernet port to port 24 on the ONS-CR2440XP.
- Launch Google's Chrome web browser and go to: http://192.168.255.254
- Log into your ONS-CR2440XP switch with the following default credentials:
username = admin
password = password
Since this is your first login after resetting the switch to factory defaults, you will be prompted to change the password to something other than the default. The password has the following requirements:
- 1 lowercase
- 1 uppercase
- 1 number
- 1 symbol
Saving settings (IMPORTANT)
Please read this section carefully; it is important to consider when modifying any settings in the rest of the article. When any setting is applied, it is only modified for the running configuration, but is not saved to the startup configuration.
To save all applied settings to the startup configuration, you must click the button in the top right:

If you do not do this step, then when it comes back online after rebooting or losing power, it will not retain any applied settings.
Add additional accounts and customize privilege levels
You can add additional users or edit users in Security > Management > Account.
Click "Add New User" to add a new user, or click on the username in the table (in this case, only admin exists) to edit an existing user.
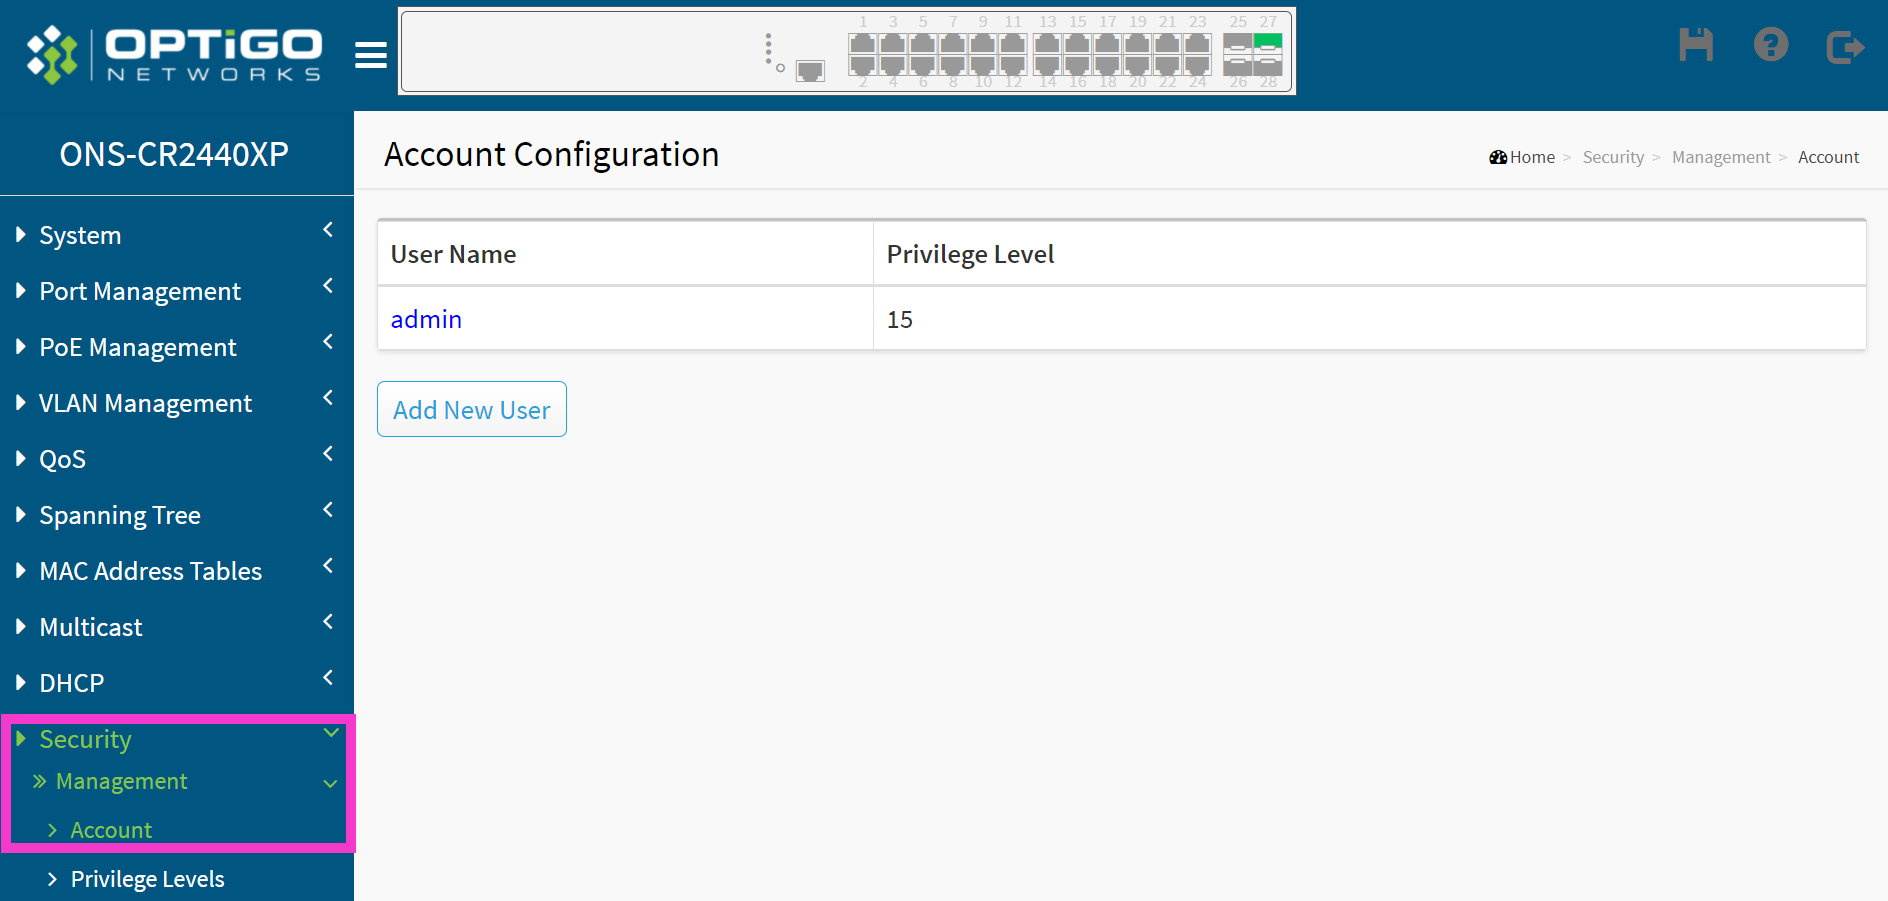
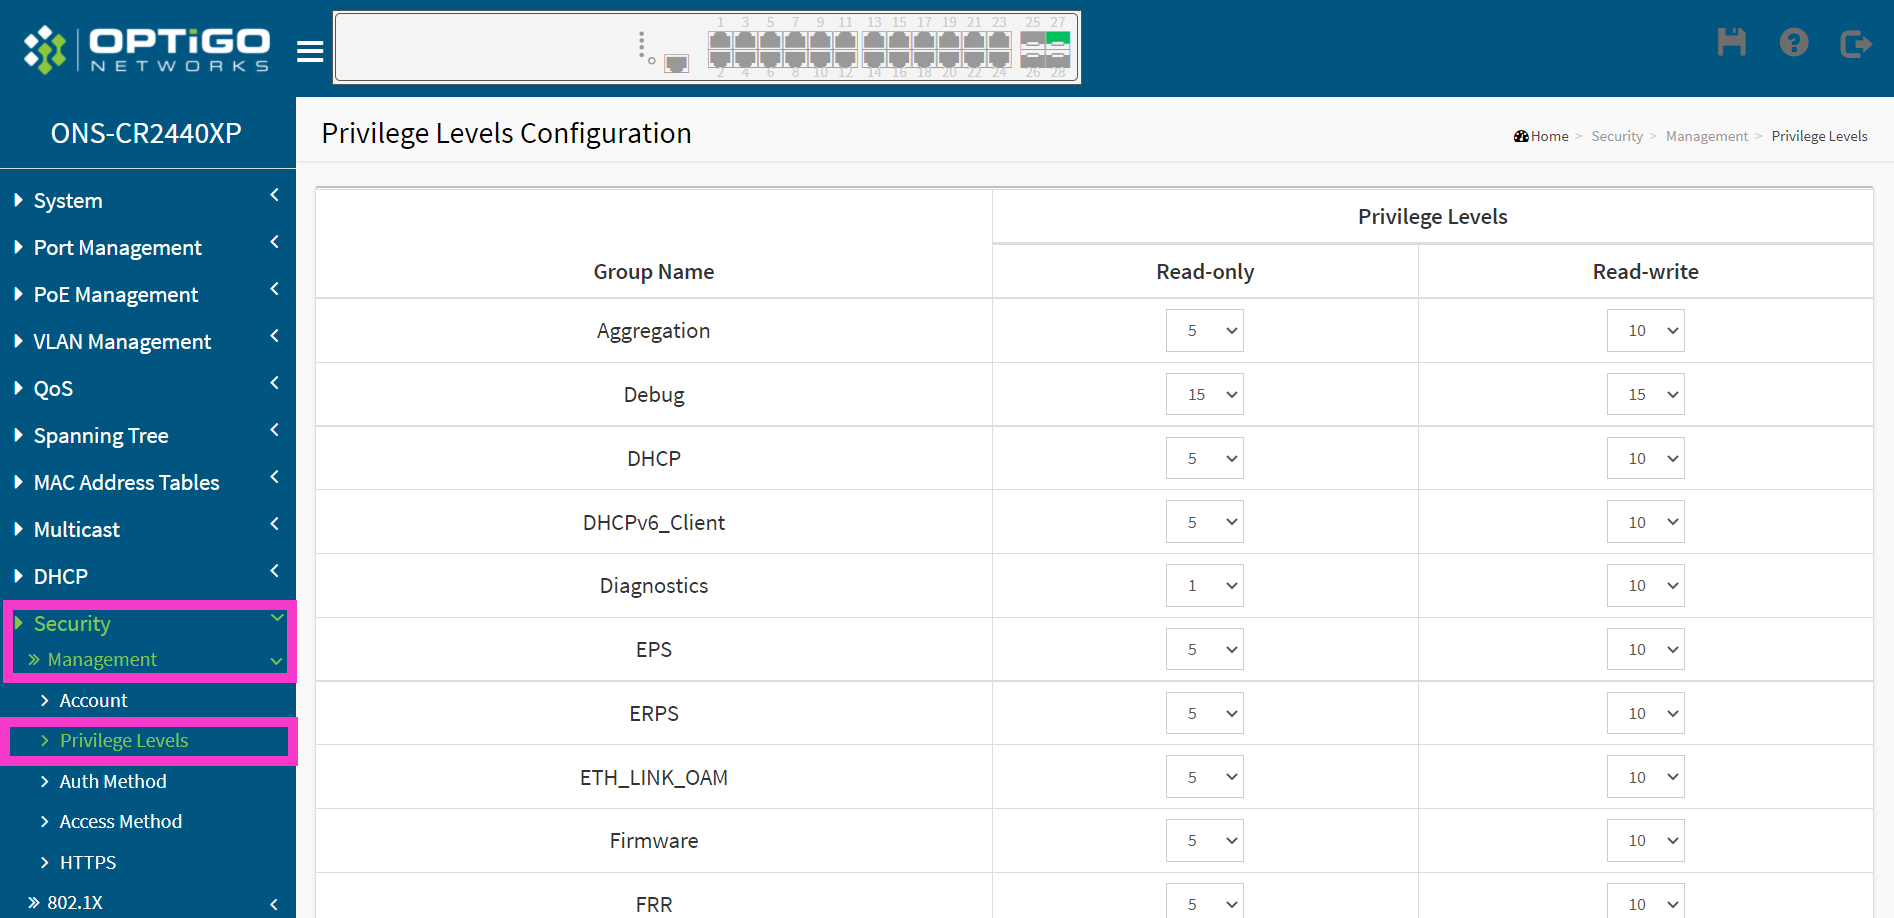
The highest privilege level is 15 and the lowest is 0. You can customize how privilege levels restrict functionality in Security > Management > Privilege Levels.
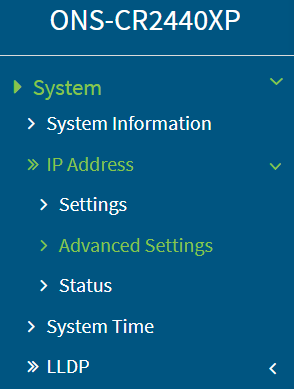
Changing IP Address Settings
The IPv4 settings can be changed to allow for a static IP address or for the device to receive an IP address from a DHCP server. Navigate to System > IP Address > Advanced Settings.
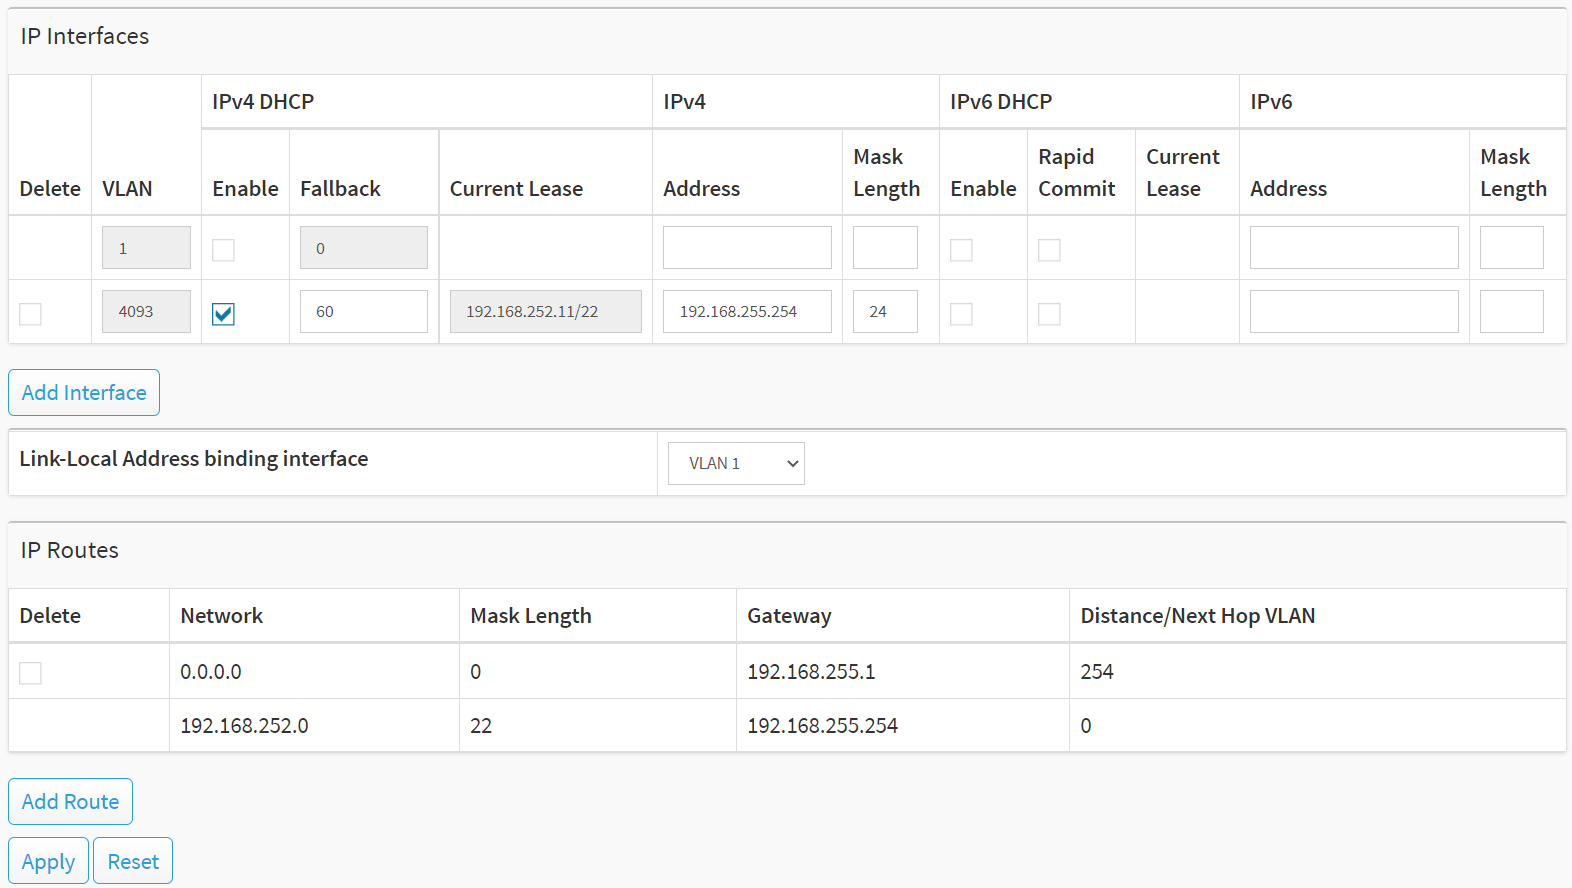
The ONS-CR2440XP can have multiple IP addresses, one per VLAN. The VLAN you are currently accessing it from is VLAN 4093. You can change its IPv4 address to be a different static VLAN, or you can configure it to use DHCP by enabling the IPv4 DHCP Enable checkbox.
To change the default gateway, delete the existing IP route with network 0.0.0.0 and mask length 0. Then, add a new route with network 0.0.0.0 and mask length 0. Set the gateway to your desired default gateway. Make sure its distance is larger than any other existing routes. Using the value 254 as shown in the image below is fine.
Click Apply at the bottom of the page to apply settings to the running configuration. You will lose connection at this point if you changed the IP address of the switch. Change your network interface's IP address and subnet to appropriate values to regain access to the switch management.
Port Security
Port security settings can be set in the Security and Access List menus. The use of the functionality within is beyond the scope of this article.
Configuring Port VLAN Settings
The ONS-CR2440XP's default switch management VLAN ID is 4093 and its default switch management port is 24. For ports 1 through 23 the default VLAN ID is 1 and the default VLAN mode is Access.
However, there are situations where you may want to change the VLAN settings on your ONS-CR2440XP (please read VLAN Modes Explained for more info).
For instance, you may want to have port 24 set up as VLAN mode Access with VLAN ID 4093, but have ports 1 to 23 set up with different VLAN IDs. This configuration provides tighter security, because the switch's management interface cannot be accessed by disconnecting a device from ports 1 - 23 and then connecting a computer in its place.
On the other hand, with this configuration you cannot communicate with connected devices and the switch management GUI from a single interface. To do this, both data and management would need to share the same VLAN ID.
Regardless of your particular application's VLAN requirements, the following examples will show you how to make the changes from the ONS-CR2440XP management GUI.
IMPORTANT:
- If your ONS-CR2440XP was previously part of a managed Connect system, reset it to default settings (hold down the reset button) before configuring it as a standalone switch.
- Never change your management VLAN ID to one that does not exist on any of the Ethernet ports, or you will be unable to manage your ONS-CR2440XP without the console cable.
- Always make sure that at least one port on your ONS-CR2440XP has been assigned the management VLAN ID (default is 4093).
- In the future, if you decide to add your ONS-CR2440XP to a Connect system managed by OneView™, make sure to reset it to default settings first.
Segregating Traffic by VLAN
To segregate the traffic on your ONS-CR2440XP by VLAN, there are 2 high level steps:
- Ensure the new VLAN ID is allowed for use
- Change the port VLAN settings.
For example, let's say you wanted to configure ports 1 and 2 as VLAN mode Access with a VLAN ID of 100. In this setup, devices connected to ports 1 and 2 would be able to communicate with each other, but not with devices connected to ports 3 - 24.
This configuration would require the steps below.
- Go to VLAN Management > VLAN Configuration. Put 1,100,4093 in the Allowed Access VLANs field.

- Change ports 1 and 2 to Access Mode and Port VLAN 100.
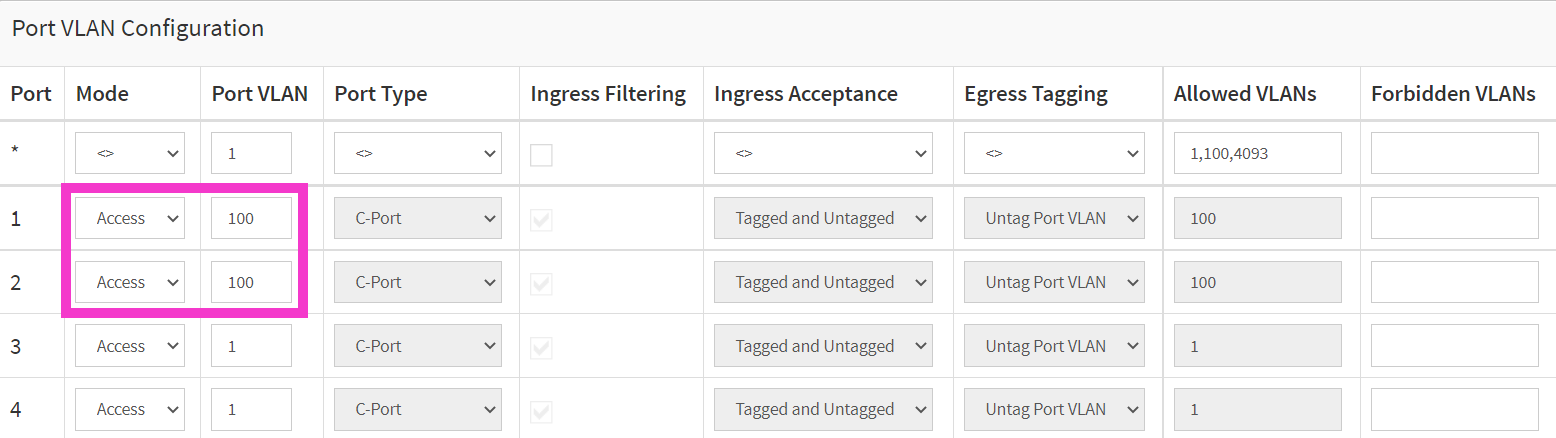
- Scroll to the bottom of the page and click Apply.
Accessing Management and Devices from a Single Interface
In order to be able to manage your ONS-CR2440XP and see all of the devices connected to it from a single interface (e.g. a PC), you need to set ports 1 to 24 as Access with the same VLAN ID.
For example, let's say you wanted ports 1 to 24 to all be configured as VLAN mode Access with a VLAN ID of 4093. Port 24 is already configured that way by default. In this setup, a PC connected to port 24 would be able to manage the ONS-CR2440XP and connect to any devices plugged into ports 1 through 24.
This can be achieved with the steps below:
- Navigate to VLAN Management > VLAN Configuration
- Ensure VLAN 4093 is on the Allowed Access VLANs field (it should already be though)
- Set ports 1-23 to VLAN Mode Access with Port VLAN 4093.
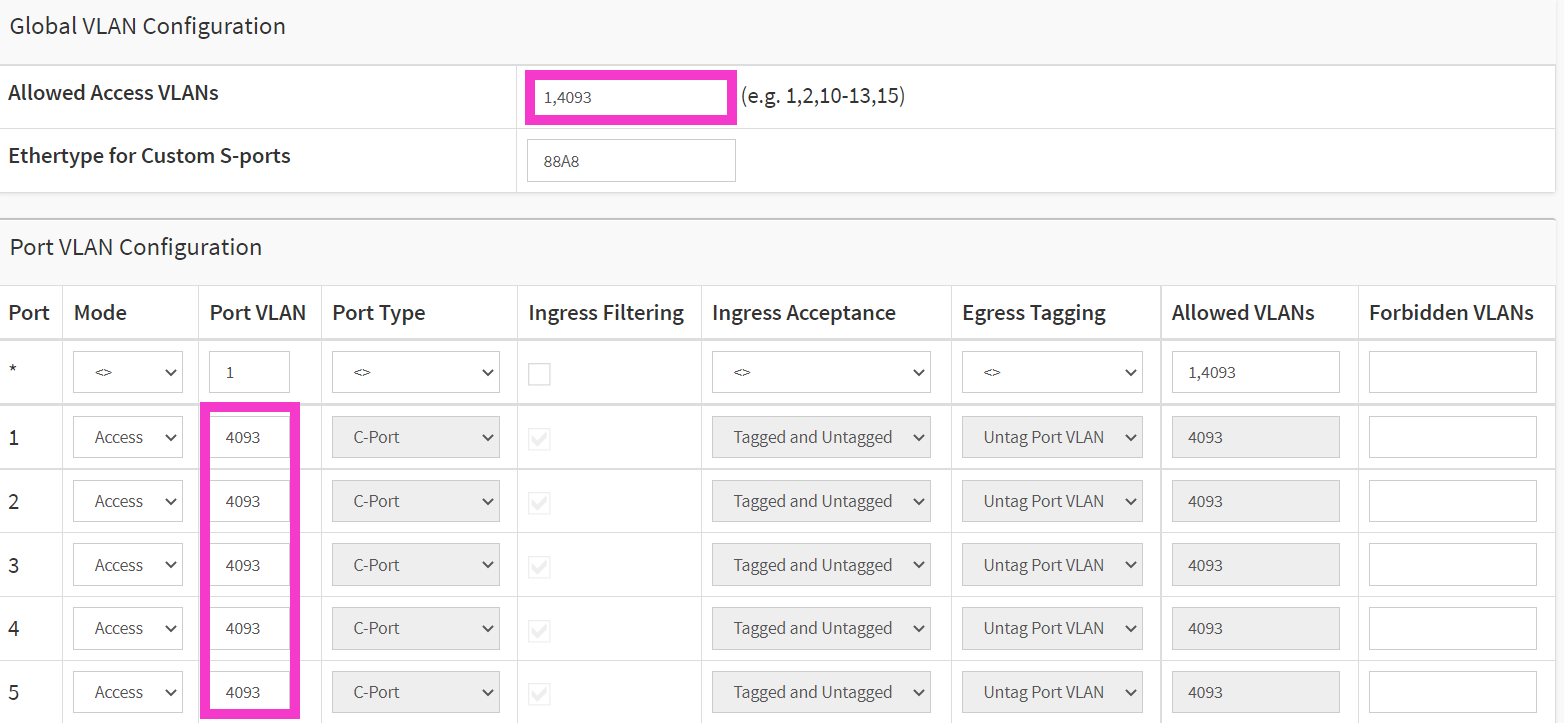
- Scroll to the bottom of the page and click Apply
Comments
0 comments
Please sign in to leave a comment.