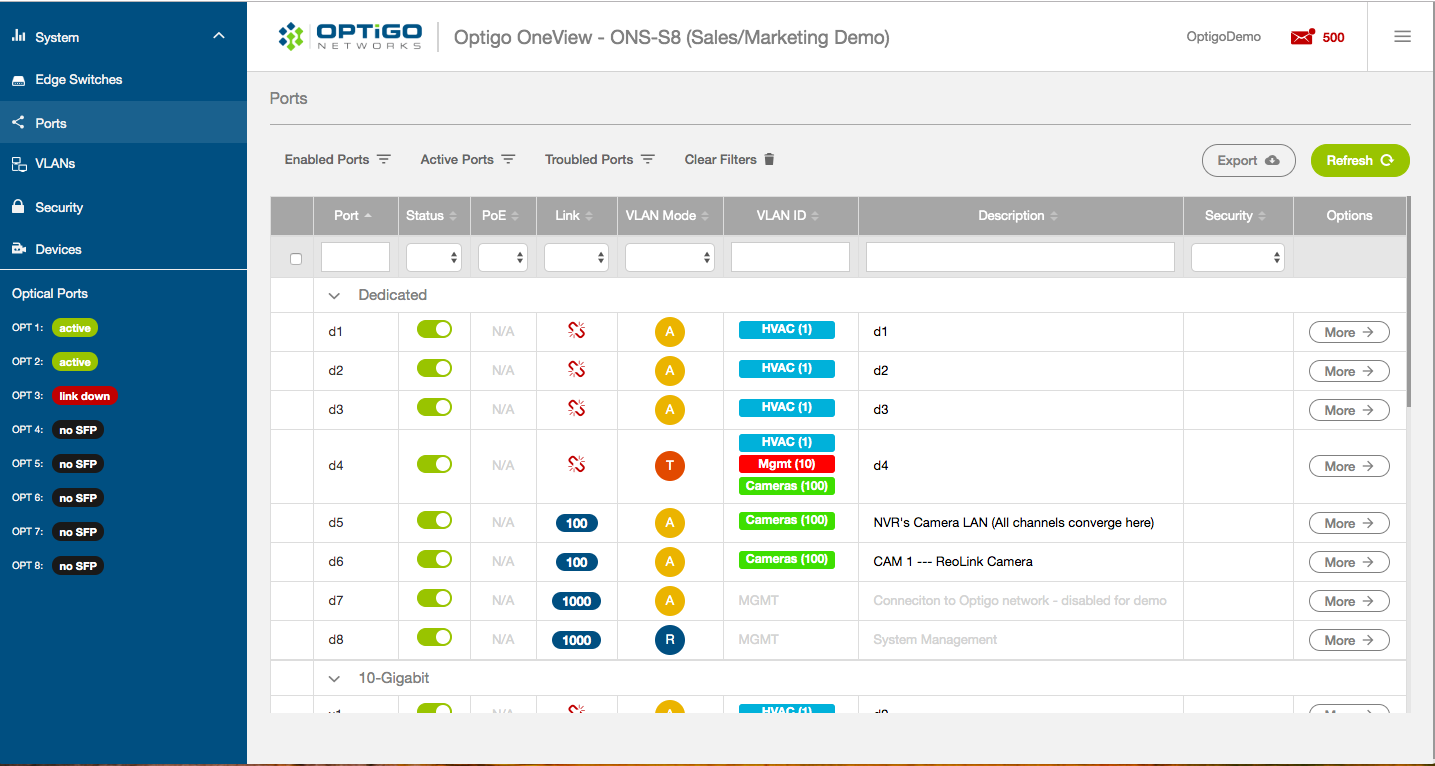
The VLANs page allows you to configure names and colors for each VLAN. For example, if all HVAC devices are on VLAN 5, you can call VLAN 5 'HVAC' and make it blue. Then, when you go to the Ports page, each port will be color-coded with the VLAN name.
For more information on VLANs, please refer to the VLAN Modes Explained knowledge base article.
NOTE:
This screen will look a bit different on systems that are managing a supported router via OneView™. For more details, please read the app note Router Management with OneView™.
Navigate to the VLANs page
From the left-hand side of the OneView screen, click on VLANs.

Edit or Add a VLAN
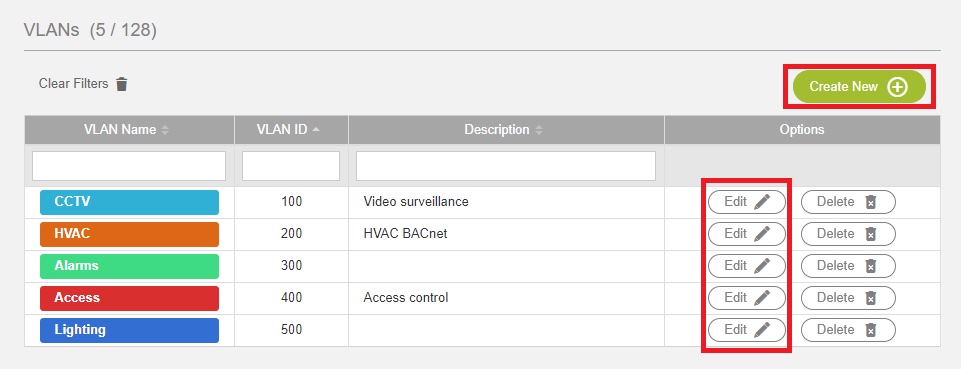
Any VLAN IDs that have been created are listed. To edit them, click on the 'Edit' button in the Options column and then change the Color, VLAN ID, VLAN Name, or Description. The 'Number of Ports' value, which is auto-generated, displays the number of ports on the entire system that are configured with the specified VLAN ID.
To add additional VLANs, click on the green 'Create New' button in the top right corner, and enter the required information.
As of version 4.4.2, OneView supports up to 128 named VLANs.
Go to the Ports page
Go to the ports page and verify that all of your VLAN settings have been correctly applied.
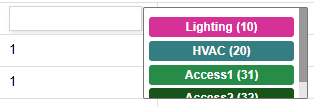
When clicking into a VLAN ID field on the Ports page, a drop-down list will appear containing all of the VLANs that have been created so far. Choose from that drop-down list or create a new one by manually entering a new number.
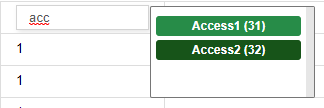
In version 4.4.2 or later, the input field can be used to filter the drop-down. This is helpful for selection when there are many VLANs in the system.
With an empty input, all VLANs appear in the dropdown.
Typing will filter the dropdown.
Don't forget to click 'Save Changes' when you're done.
Comments
0 comments
Article is closed for comments.