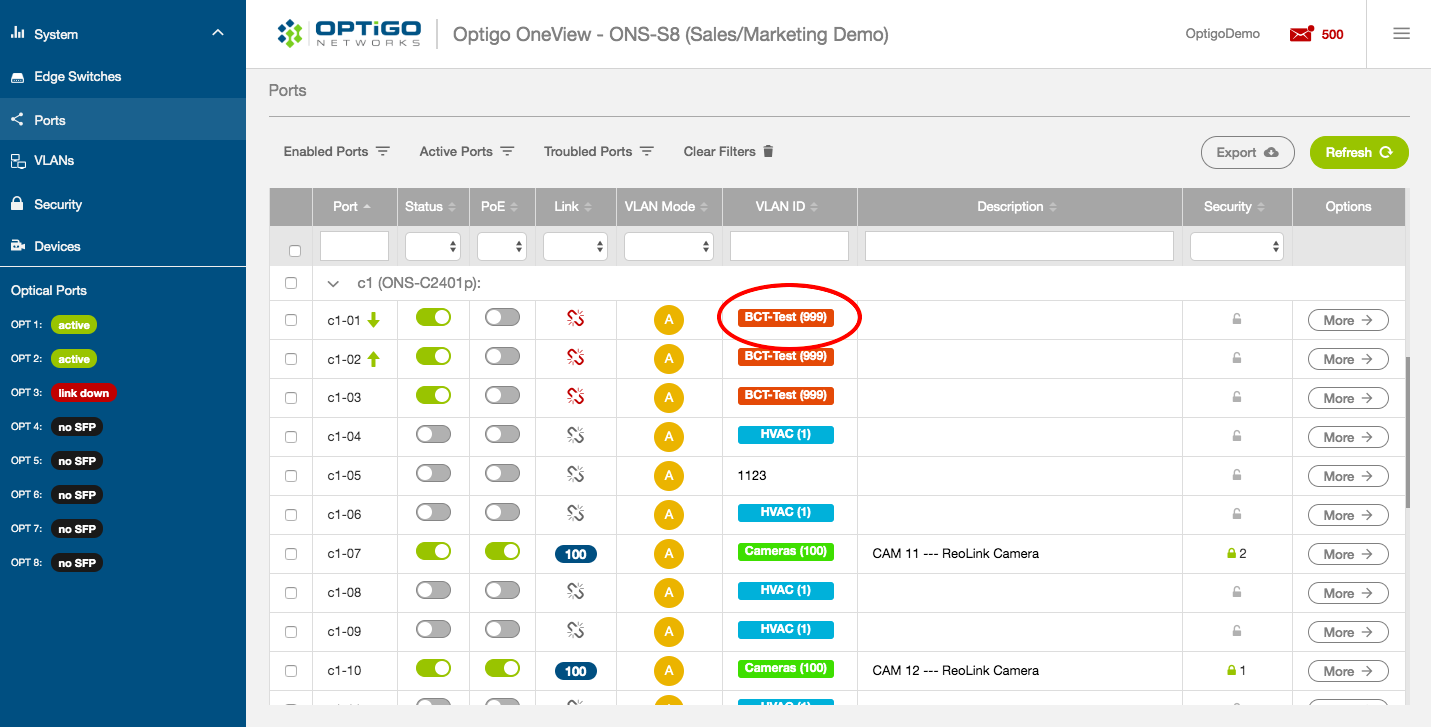
Clicking on 'Ports' (in the left-hand menu) will bring you to the 'Ports' page, which allows you to configure each of your system's ports for the specific devices connected to them.
NOTE:
This screen will look a bit different on systems that are managing a supported router via OneView™. For more details, please read the app note Router Management with OneView™.
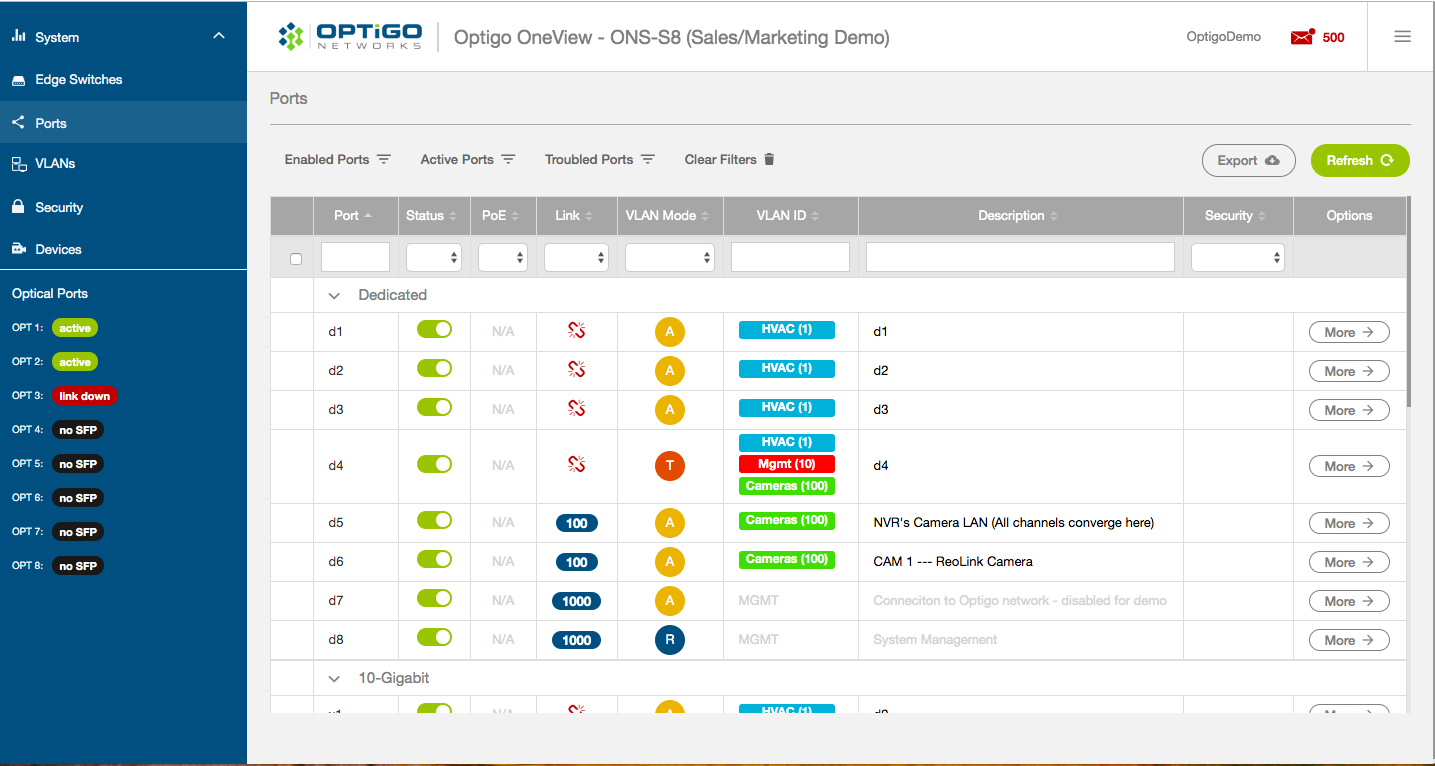
Here, you will see every port for every Edge Switch that is connected to the system. This list is also updated as each new switch is added.
As you plug in each Edge Switch, it will automatically appear with an auto-assigned device ID and model number, such as 'c1 (ONS-C2401p)'. We recommend documenting each device ID in your configuration spreadsheet and/or updating the device name in the 'Edge Switches' page.
Please note that although a Connect Spectra™ system was used for the screenshots in this article, the 'Ports' page in a Connect Hybrid™ system is almost identical. The only real difference is that Hybrid systems do not have optical ports.
Port
This field displays the port's number and the switch it belongs to. For instance, the first port on a 24-port ONS-C2401p Edge Switch with a switch ID of 'c4' would be listed as 'c4-01' and the last port on that switch would be listed as 'c4-24'.
If odd and even ports have green arrows pointing to each other (e.g. port 1 is pointing to port 2, port 7 is pointing to port 8, etc), then these ports are paired (see 'Device / Security' below).
This is only available when spanning tree is enabled.
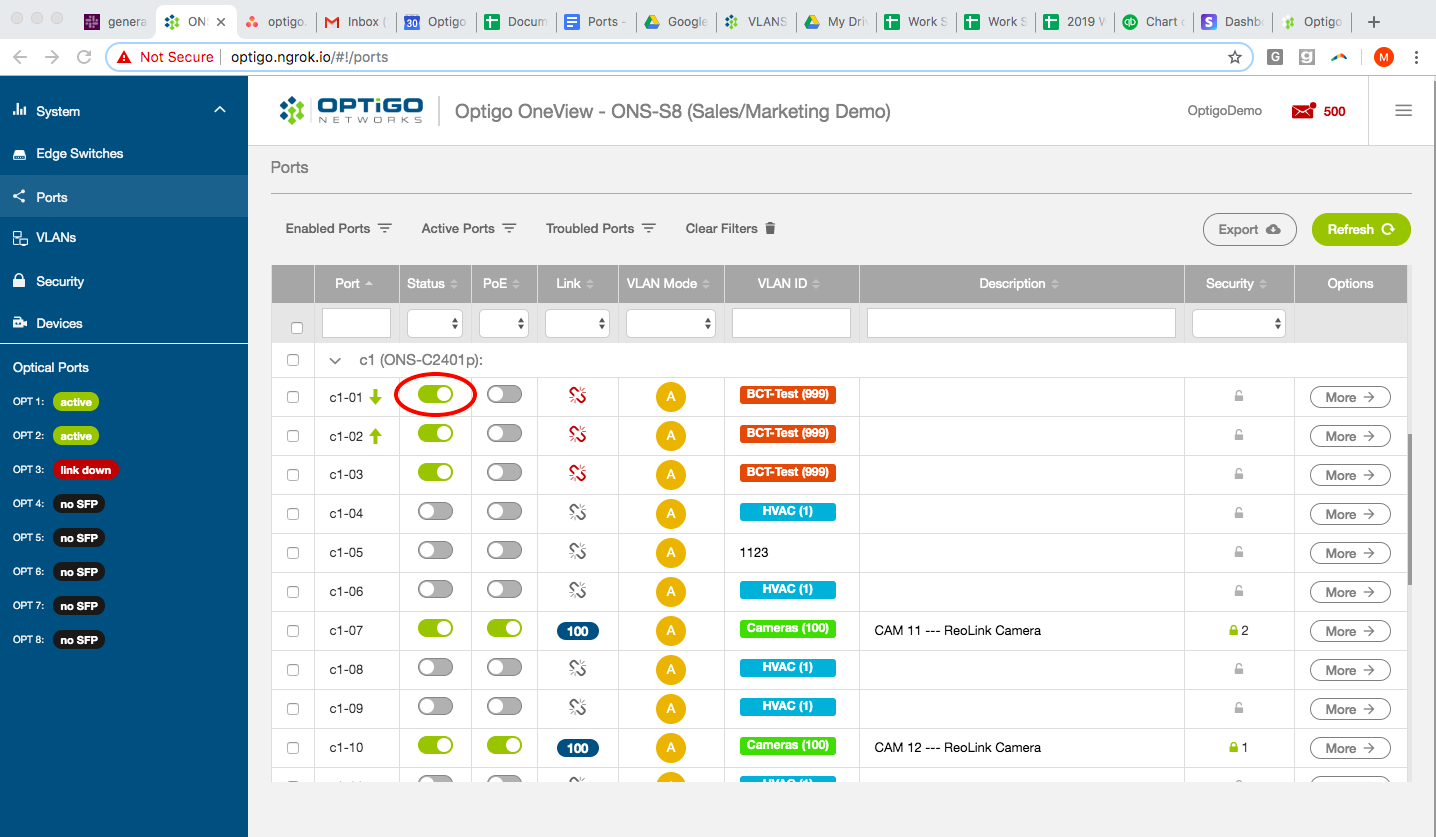
Status
You can enable or disable individual ports by toggling the 'Status' slider switch: right/green = enabled, left/gray = disabled.
PoE
You can control PoE (Power-over-Ethernet) power to individual ports by toggling the 'PoE' slider switch: right/green = power ON, left/gray = power OFF.
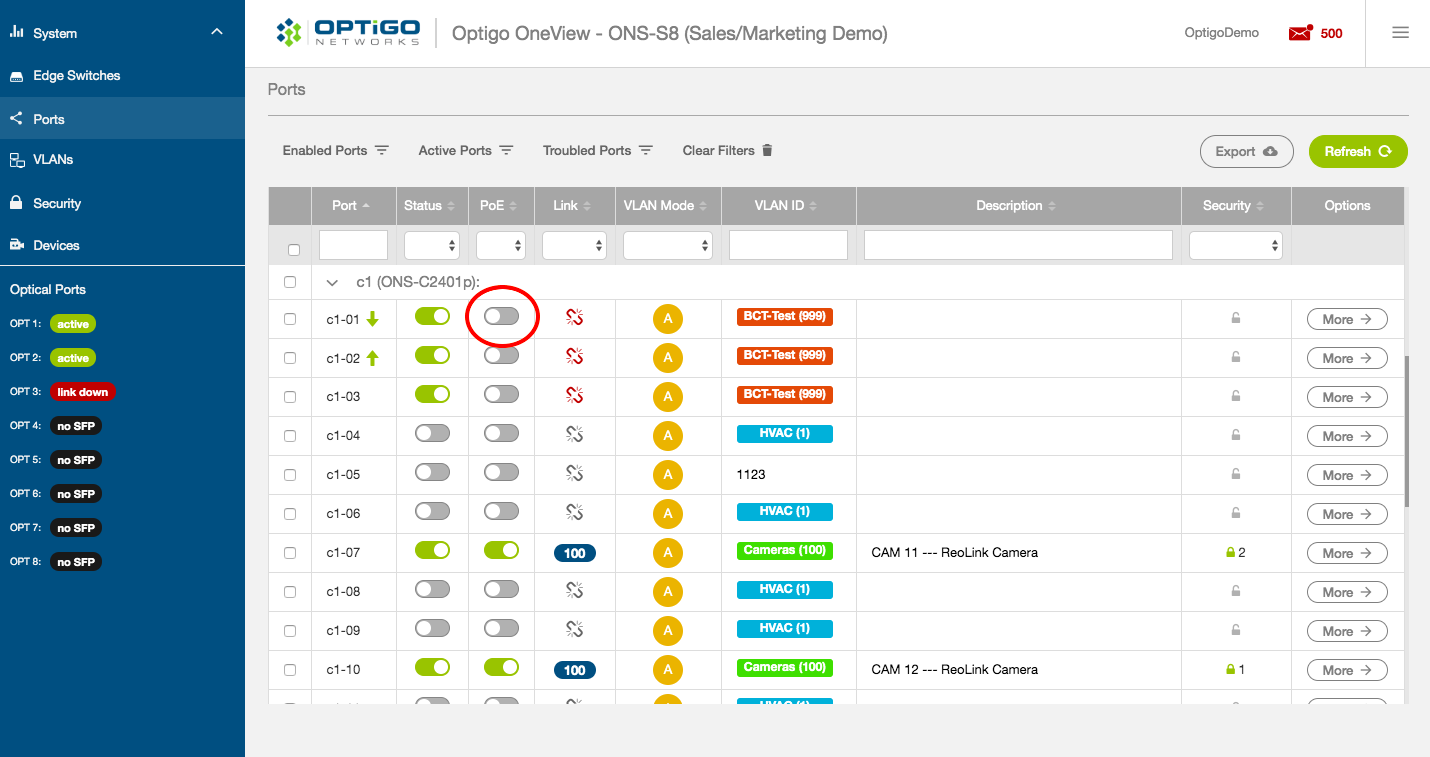
(NOTE: Switches that do not support PoE will have n/a in this column)
Link
This field displays the link state, which can be any of the following:
- Gray broken link - switch is disabled/off or the port is disabled
- Red broken link - Link is down (i.e. does not have a device connected)
- Blue oval with a number - the link is up and the number is the speed of the link (in Mbps)

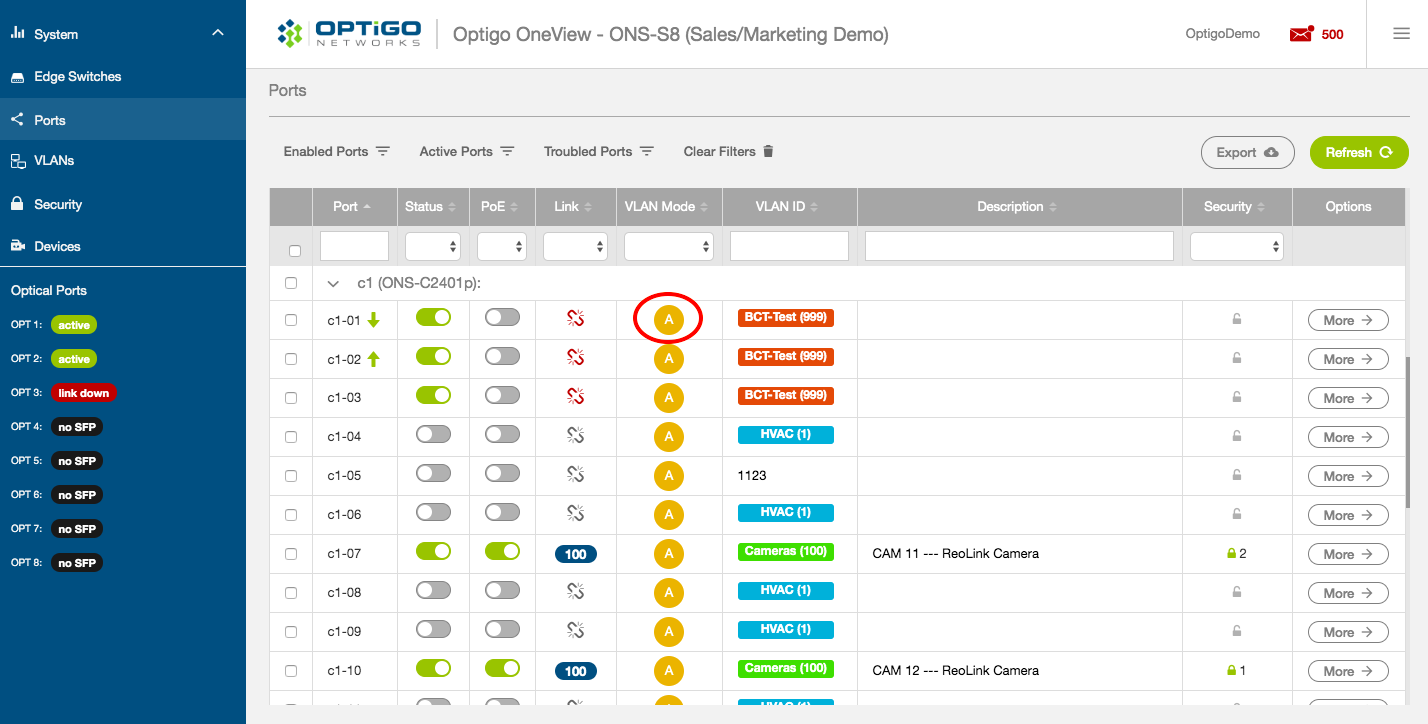
VLAN Mode
This column indicates whether the VLAN is in access (A), trunk (T), or local (L) mode. Click on the field to change the mode, and click “Save Changes” in the bottom right.
For more information on VLANs, please refer to the VLAN Modes Explained knowledge base article.
VLAN ID
This column allows you to set the VLAN for each port. Click on it to change the VLAN. When a port is in access mode, a selectable drop-down of VLANs created in the VLANs page will appear, but you may also write in any VLAN number between 2 and 4092. A default named VLAN will be automatically created up to a maximum of 128 the first time it is used in the system. Make sure you save your changes before leaving the screen.

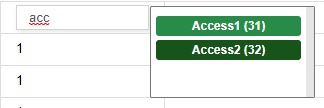
In version 4.4.2 or later, the input field can be used to filter the drop-down. This is helpful for selection when there are many VLANs in the system.
With an empty input, all VLANs appear in the dropdown.
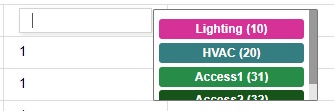
Typing will filter the dropdown.
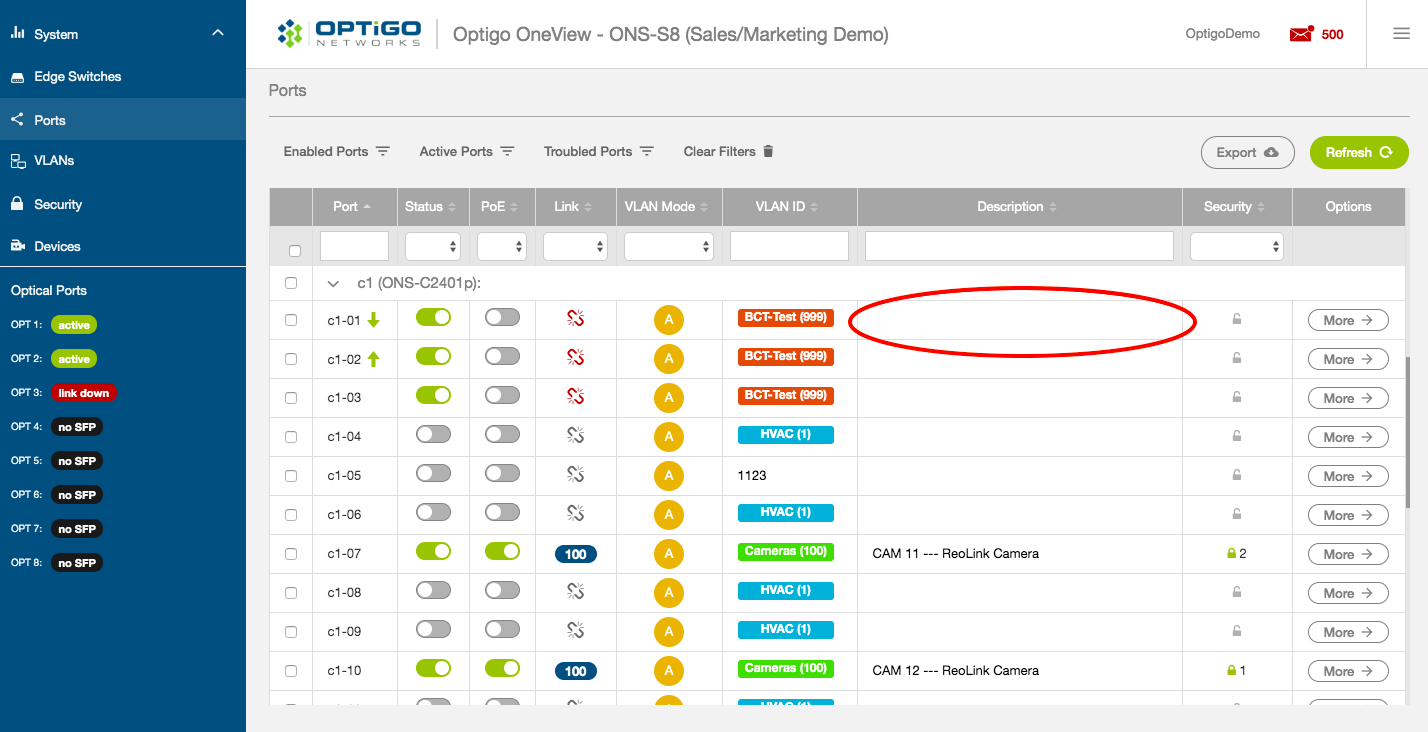
Description
In this section you can fill in any info you like, such as which device is connected to that port, where it is located, etc. Don't forget to save your changes when you're done.
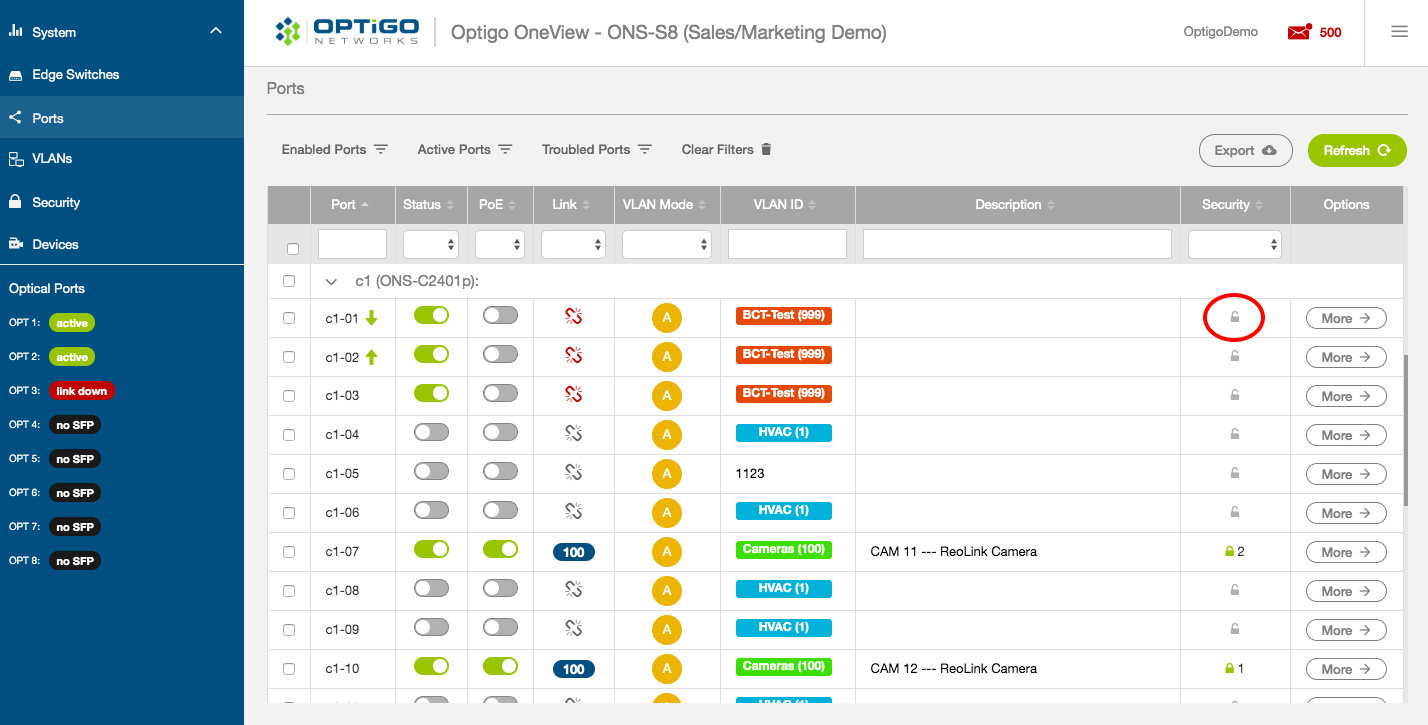
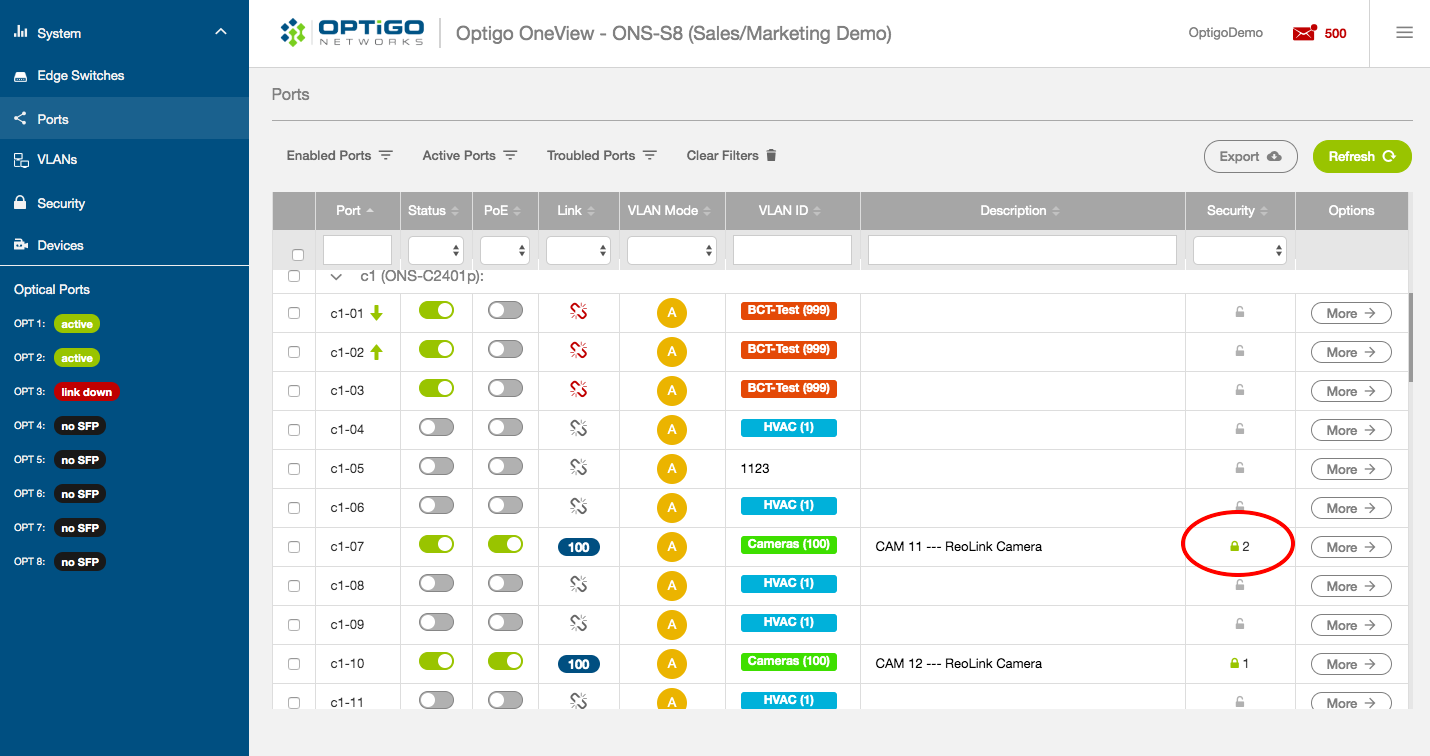
Security
This column shows you if the port has been secured to only accept traffic from a certain MAC address (or addresses in the case of device loops).
- A gray open lock icon means the port will accept traffic from any device.
- A green closed lock with a number beside it means the device is only accepting traffic from specific devices with specific MAC addresses. The number specifies how many devices are accepted by that port.
Click on the lock icon to see which MACs are authorized for that port, and the associated vendor.
The accepted MACs can be set individually for each port by clicking on the “More” button in the 'Options' column. They can also be applied across the entire network using OneClick Secure.
Note regarding SFP ports
In version 4.7.0 and later, the Ports page now includes the SFP ports of Edge Switches. However, the table does not contain any useful info for them, because the SFP ports are not manageable. You can see the info for the SFP ports using "More" button, which is described in the sections below.
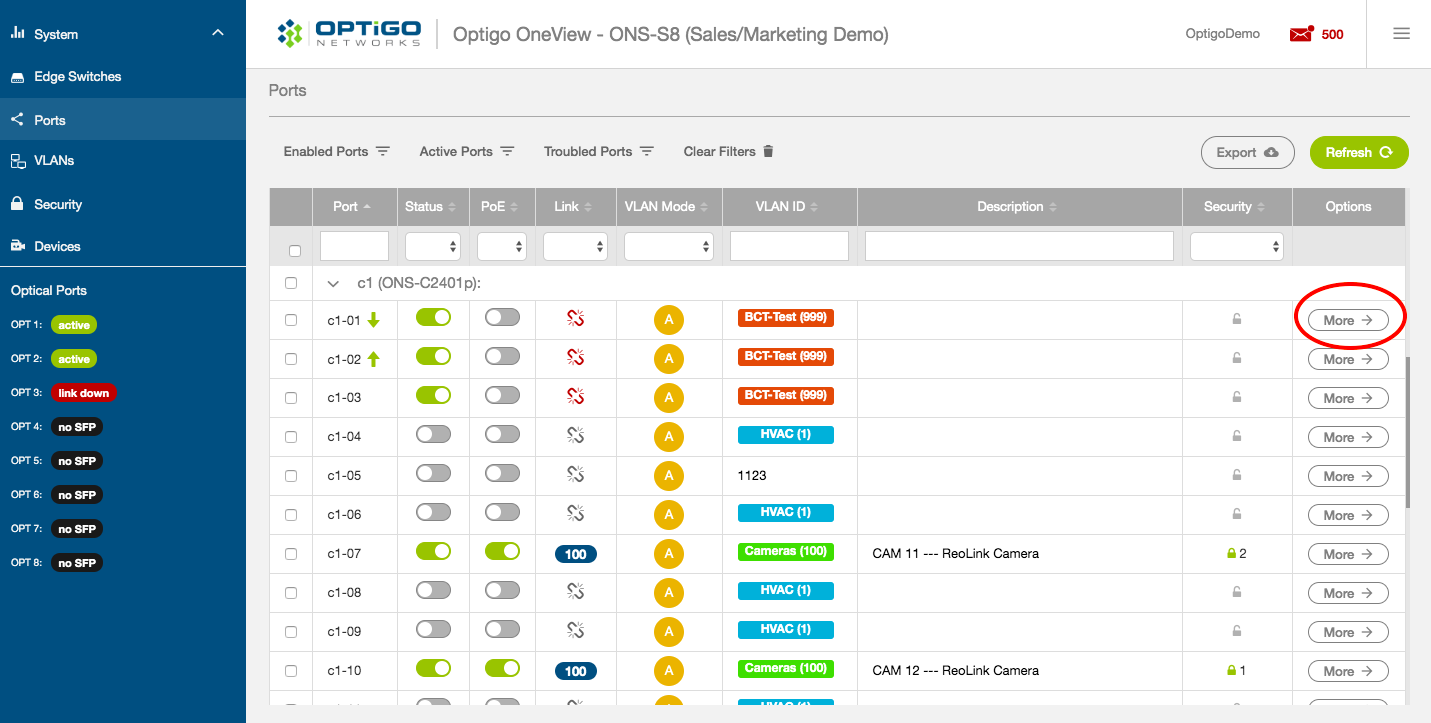
Detailed Port View
Clicking on the 'More' button in the 'Options' column will give you detailed information about the port.
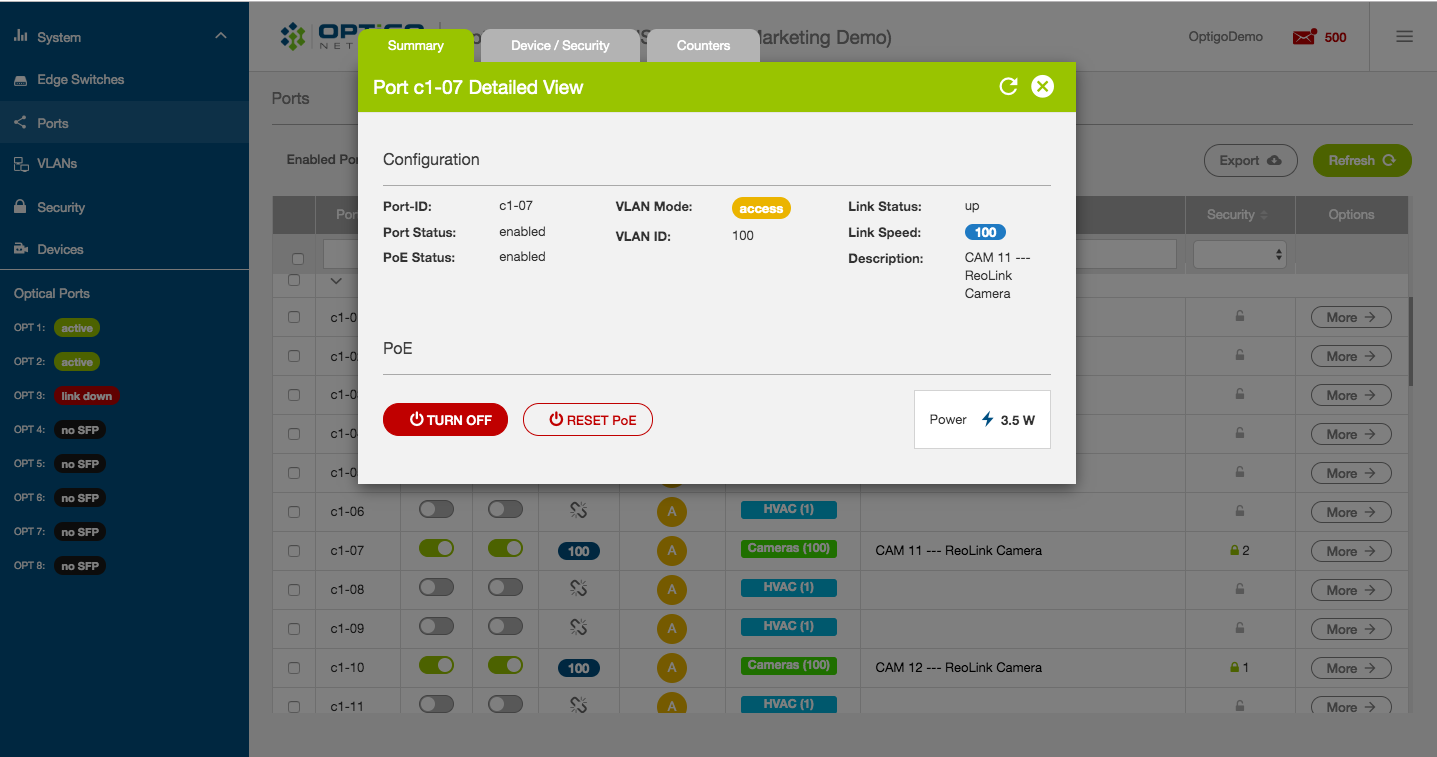
Summary
The summary contains much of the same information as the table.
For ports that support PoE, this section also includes the following options:
- Turn Off - This button turns off the PoE power at that port.
- Reset PoE - This button turns the PoE off and then back on again (i.e. power cycle). This is
- Power - This displays how much PoE power is being drawn by the devices connected to this port.
In version 4.7.0 or later, SFP diagnostic info may be displayed for SFP ports, if it's available. However, not all SFP models provide diagnostics, e.g. the ONS-CU-SFP and other RJ45 SFPs. In addition, not all switch models support SFP diagnostics even if the SFP does. The models that do not support this info are listed in this page.

Device / Security
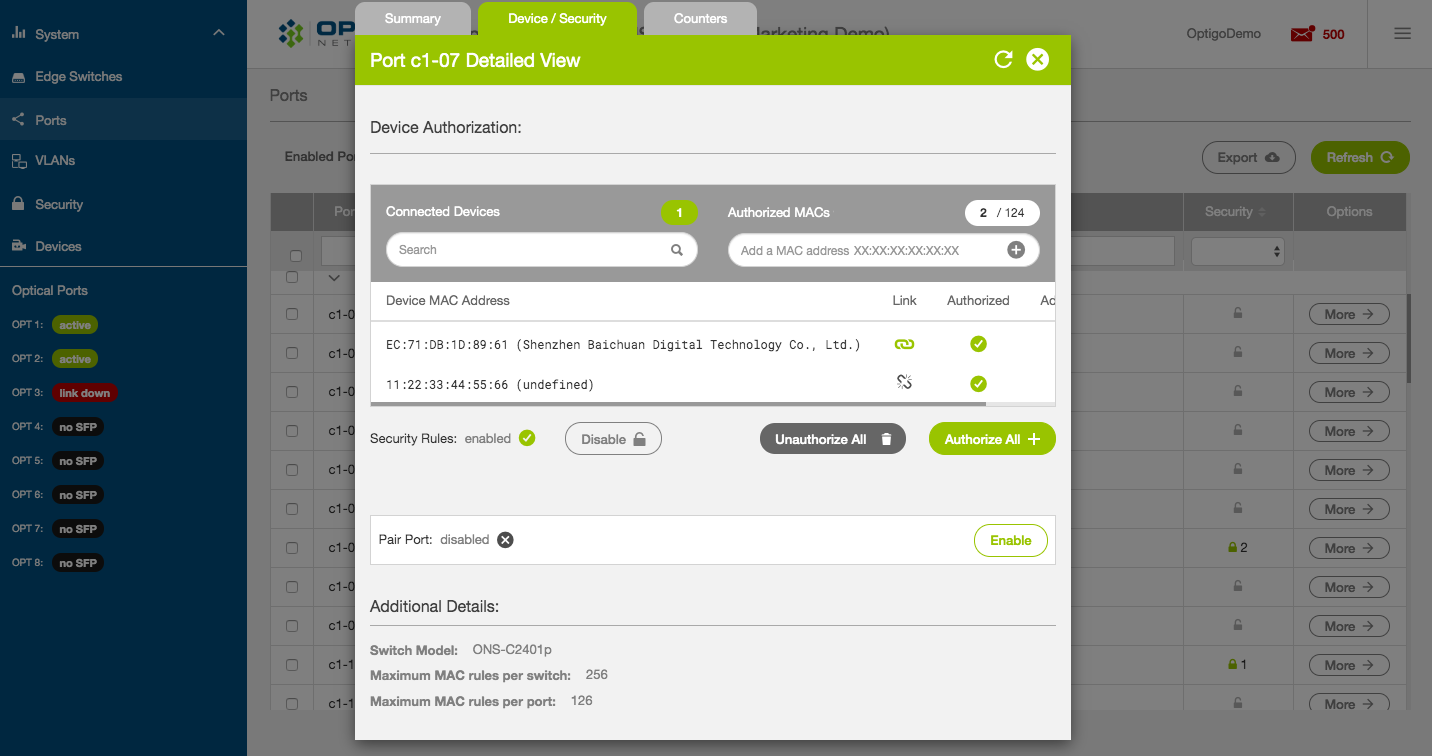
This table will automatically populate with any devices that are connected to that port. If there are multiple devices connected to the port, use the search bar to find specific devices. The table contains the following info and options:
- Link - is the device currently connected to this port?
- Authorized - is the device currently authorized to be connected to this port?
- Add/Remove - enable or disable the port.
Below this table, there are 3 additional options:
- Unauthorize All - will unauthorize all devices in the list.
- Authorize All - will authorize all of the MAC addresses shown in the list to send traffic through this port. Type a MAC Address into the “Authorized MACs” box to authorize additional MACs.
- Disable - will disable MAC authorization. Use this temporarily if you would like the switch to find new devices. Make sure you enable again before you finish.
Note for below - port pairing is only available when spanning tree is enabled.
To pair a port, click 'Enable' beside 'Pair Port' and it will automatically be paired with its designated partner port. Odd ports are paired with the next port. Even ports are paired with the previous port (e.g. 1 and 2 are always paired together).
Additional details at the bottom will tell you how many MAC addresses can be connected per port and per switch, depending on the model.
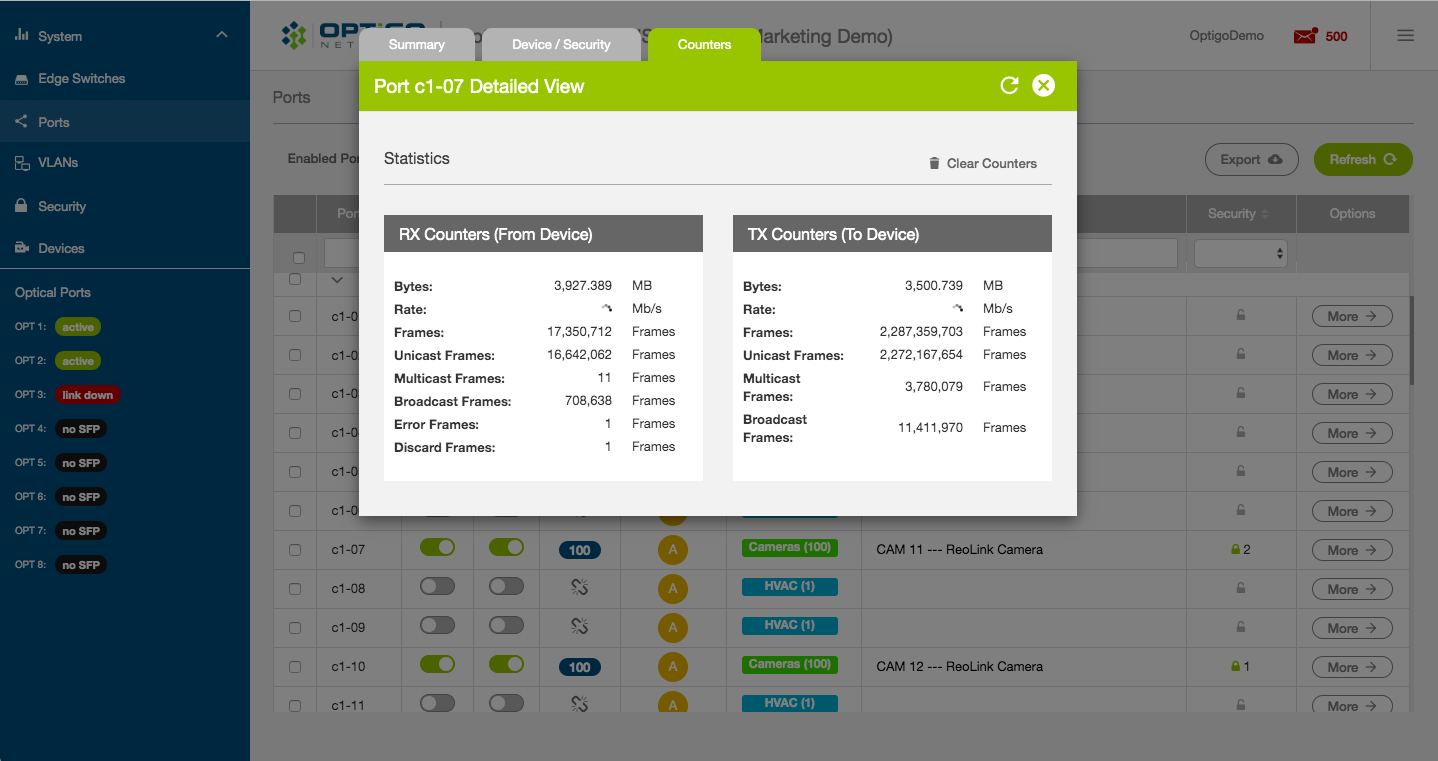
Counters
The 'Counters' tab provides the current statistics for network traffic to and from the device connected to that port.
Filters
The top row of the 'Ports' table contain fields for filtering for specific ports (e.g. port number, status, VLAN ID, etc).

Above these fields are 3 simple pre-set filters:
- Enabled Ports - all ports with 'Status' set to enabled.
- Active Ports - all ports that have a device connected to them (i.e. blue link up icon with a link speed value).
- Troubled Ports - all enabled ports with no device connected to them (i.e. red link down icon).
Clicking 'Clear Filters' will remove all filters and reset the page to display all ports.
Clicking the 'Export' button in the top-right will allow the user to export the contents of the 'Ports' page to an Excel spreadsheet or CSV file.
Comments
0 comments
Article is closed for comments.